Guest count decides most of this list: a hand-drawn sketch stays readable with a few tables, while an alphabetical list for guests holds up for a larger crowd.
The ideas run from a hand-drawn sketch that costs an afternoon to table shapes like U-shaped, long, round and mixed, plus an envelope pocket wall display and place cards.
Whichever you pick, the chart itself is a late job, since RSVPs usually settle about 3–4 weeks before the wedding.
1. U-shaped Layout
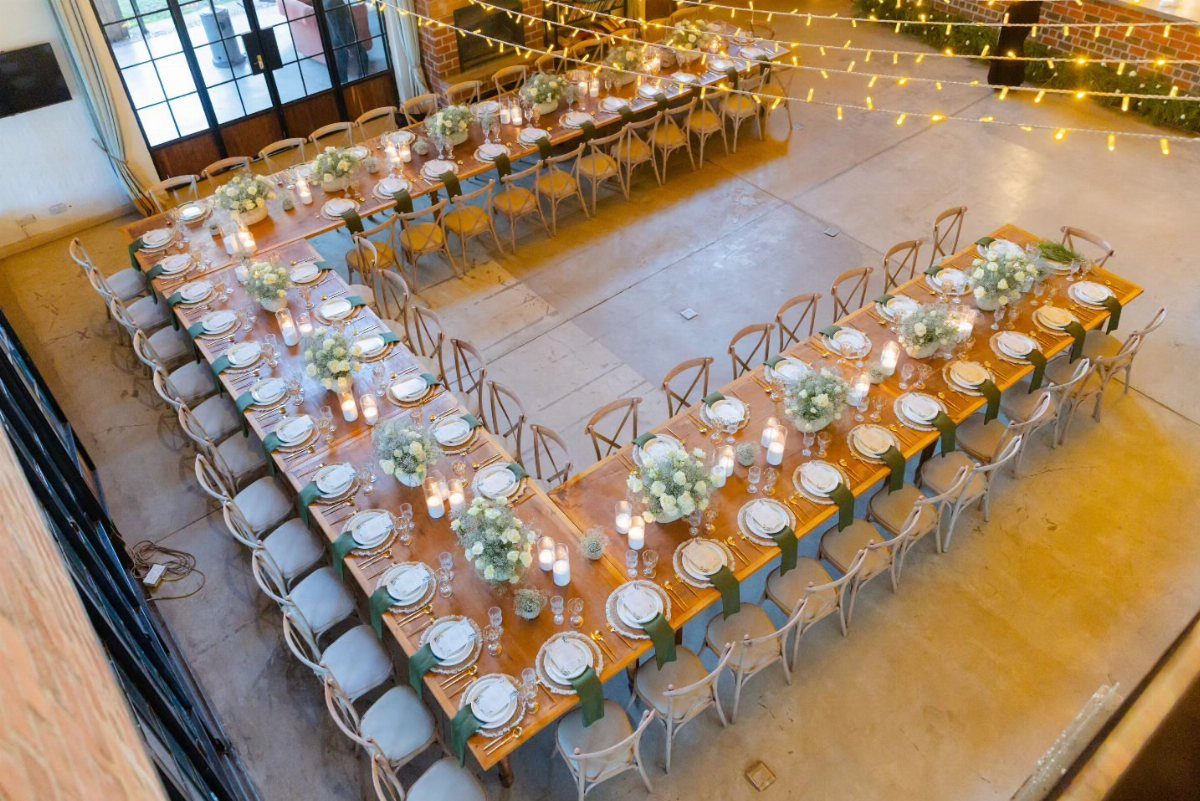
A U-shape works best when you want everyone facing inward, close enough to talk across the open middle. Long tables give it a family-style feel that round tables rarely match.
Plan the seating around the open end, since that is where toasts and the couple’s eyes will land. The couple or the main table goes at the base of the U, and the arms are for close family and friends.
The open middle also gives you a spot for a floral installation or a clear path for the first dance.
2. Printable Seating Chart
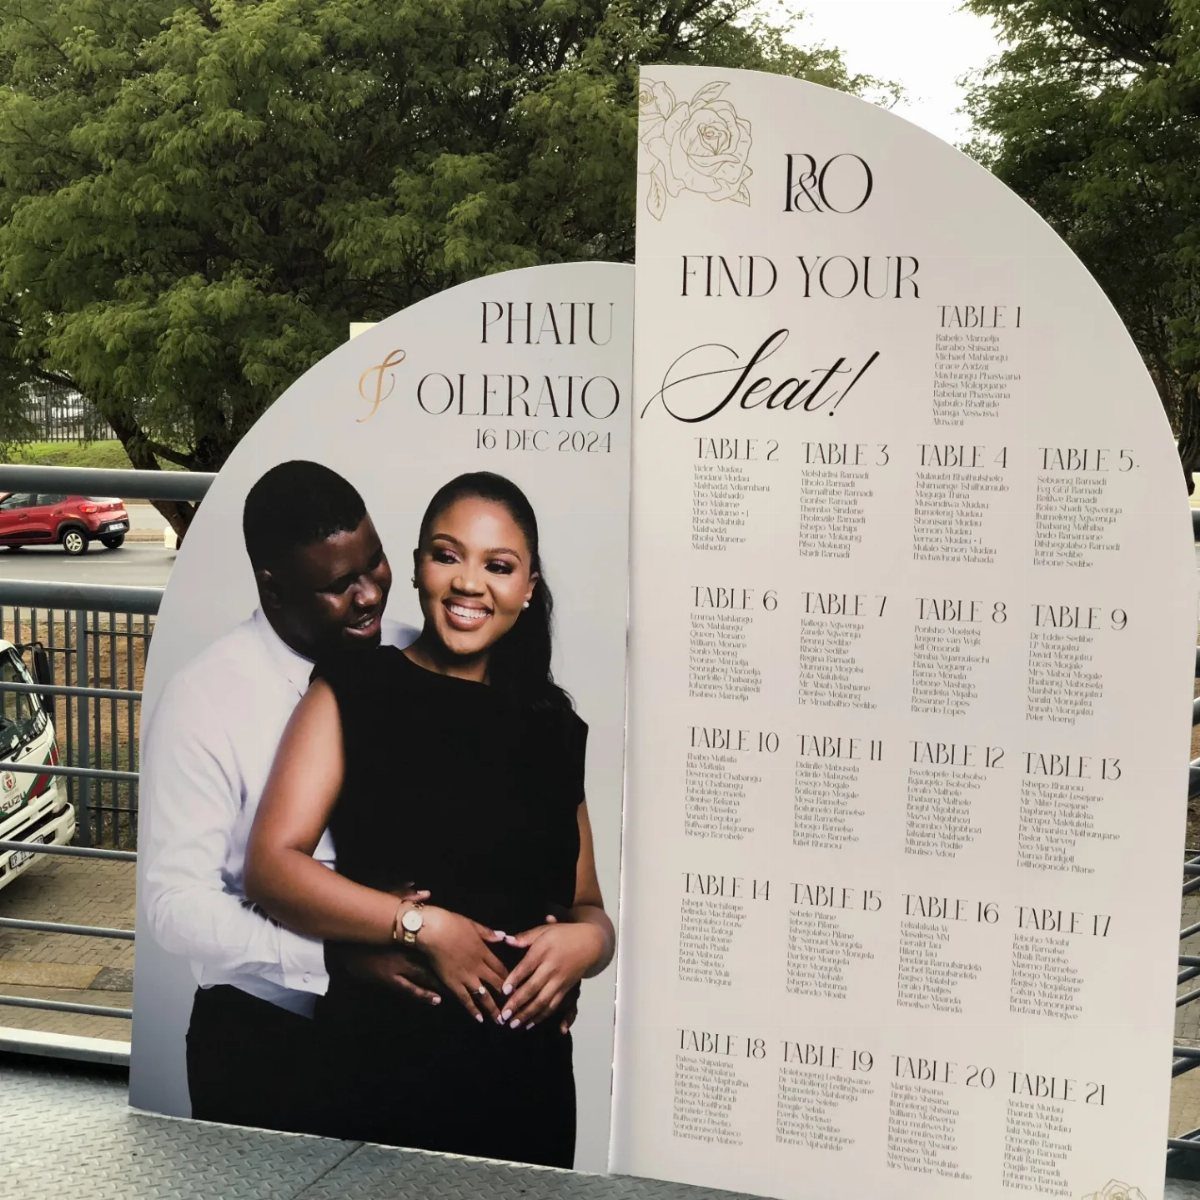
Printing your chart means you can design it once and reuse the same file for the large display, the small copies, and the day-of backup.
An arched format with a couple’s photo, names, date and guests grouped by table number turns a practical list into a keepsake.
Proof every name against your final RSVP list before you send it to the printer. A misspelled name on a poster-size print costs you a reprint.
Group guests by table, then keep the type large enough to read from a few feet away.
With over 130 free fonts to choose from, your wedding seating chart design can capture the look and feel of your wedding.
— Canva
3. Alphabetical List for Guests
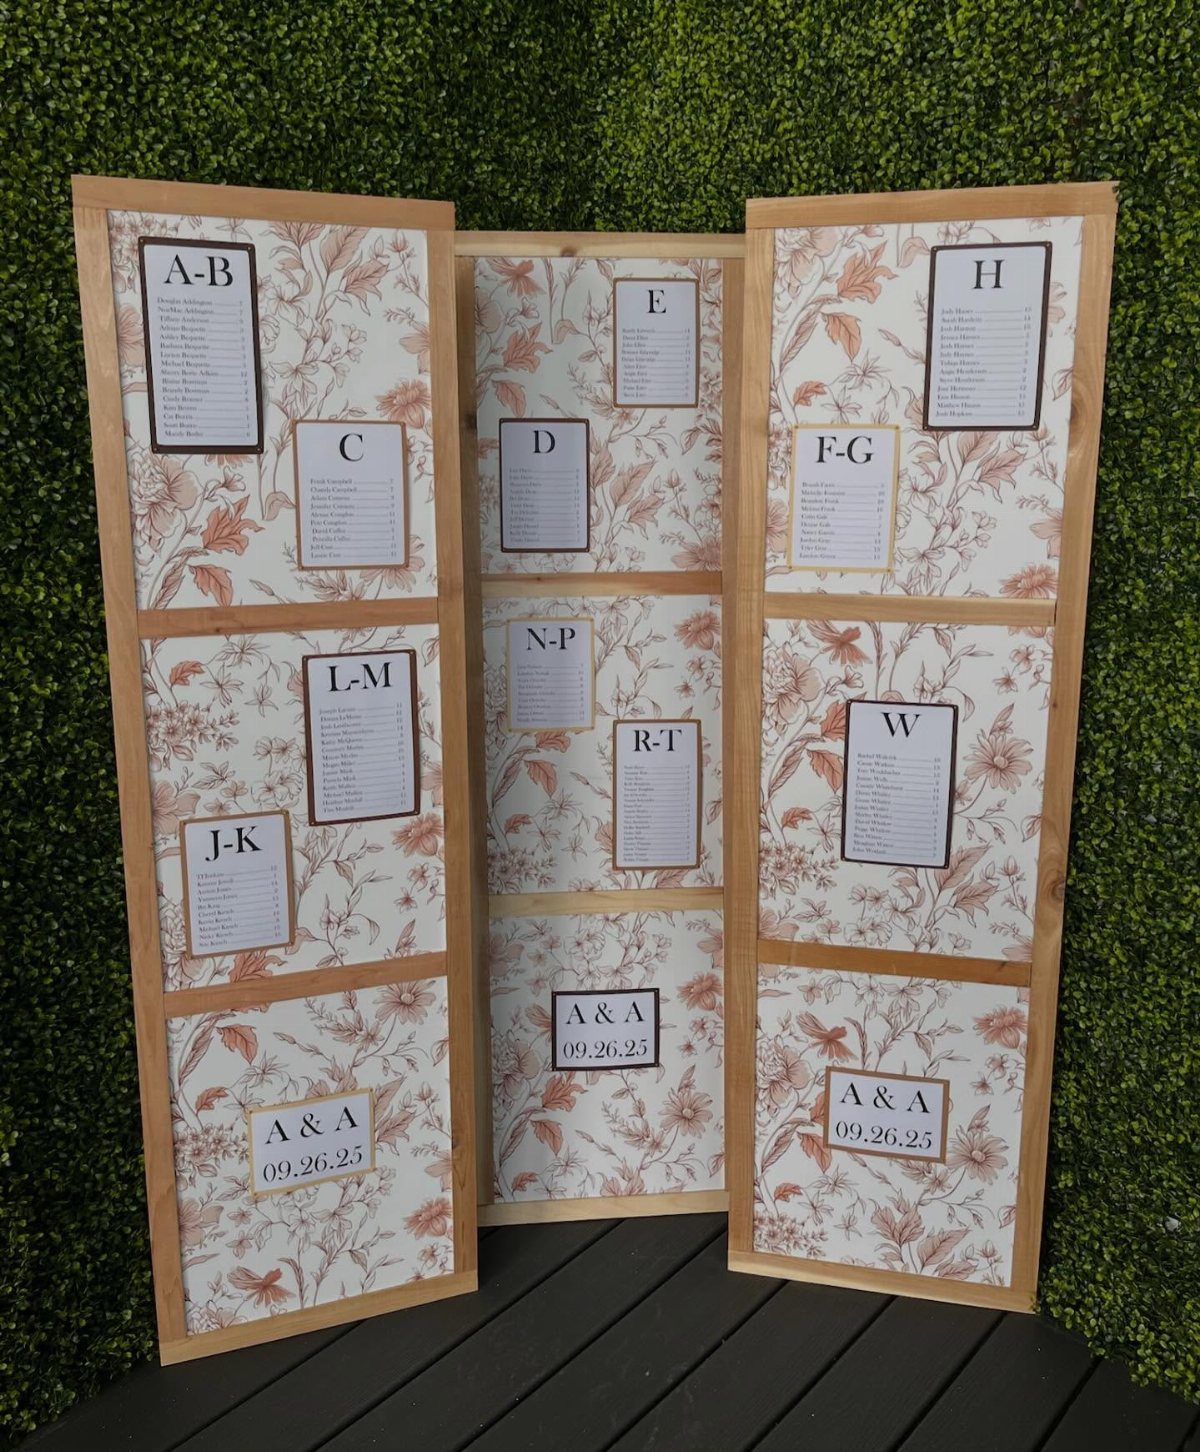
Guests hunt for their own name, so list everyone alphabetically and the search takes seconds. Beside a table number, each surname becomes a quick scan instead of a crowd around a board.
A three-panel folding screen helps because you can split the alphabet across panels, say A–H, I–R, S–Z, and keep guests from stacking up in one spot.
Put the date and your initials at the top and the screen reads as decor, not paperwork.
I like this for larger guest lists, where table-by-table grouping gets hard to read.
4. Tables Around the Dance Floor
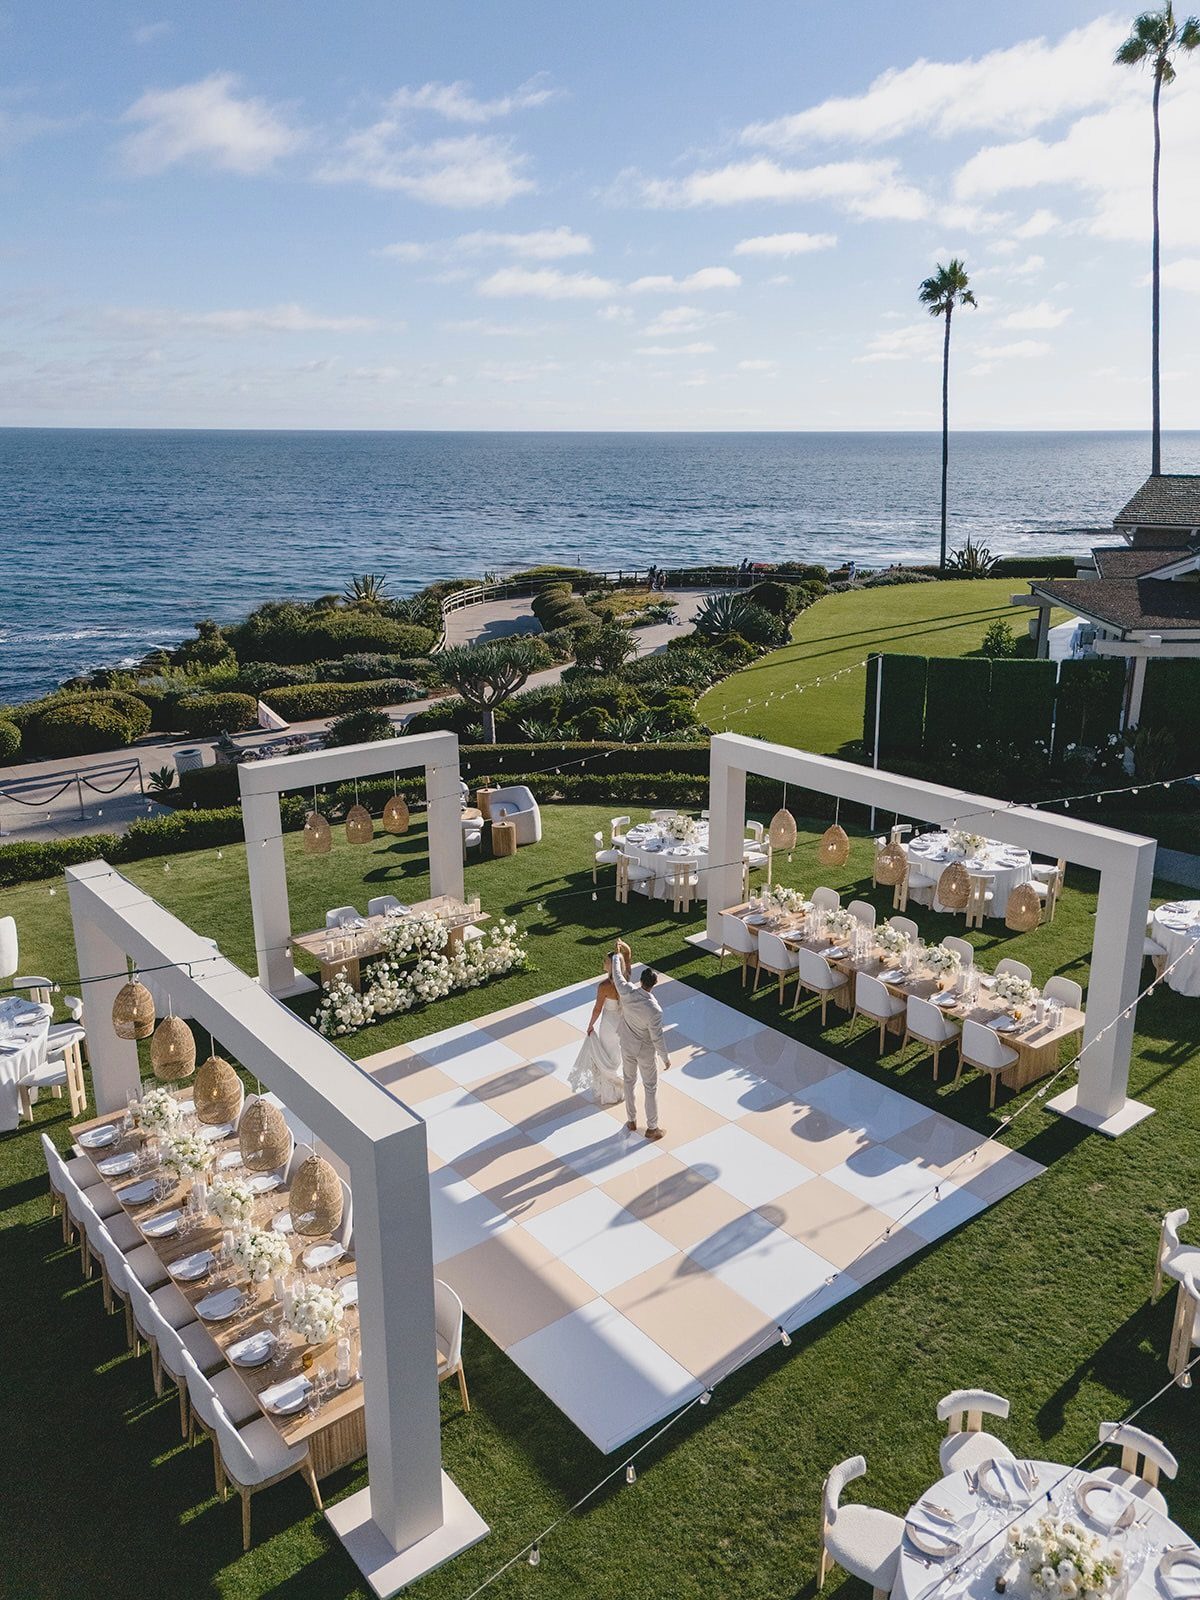
Setting tables around the dance floor keeps the party in the middle of the room, so nobody sits far from the action.
With long tables framing a checkered floor, guests watch the first dance from their seats and can step onto the floor in a few strides.
Leave a clear walking lane between each table and the floor’s edge. Chairs pulled out should not block anyone heading to dance.
Seat the guests who love to dance closest, and the grandparents a little back, still with a good view.
5. Place Cards
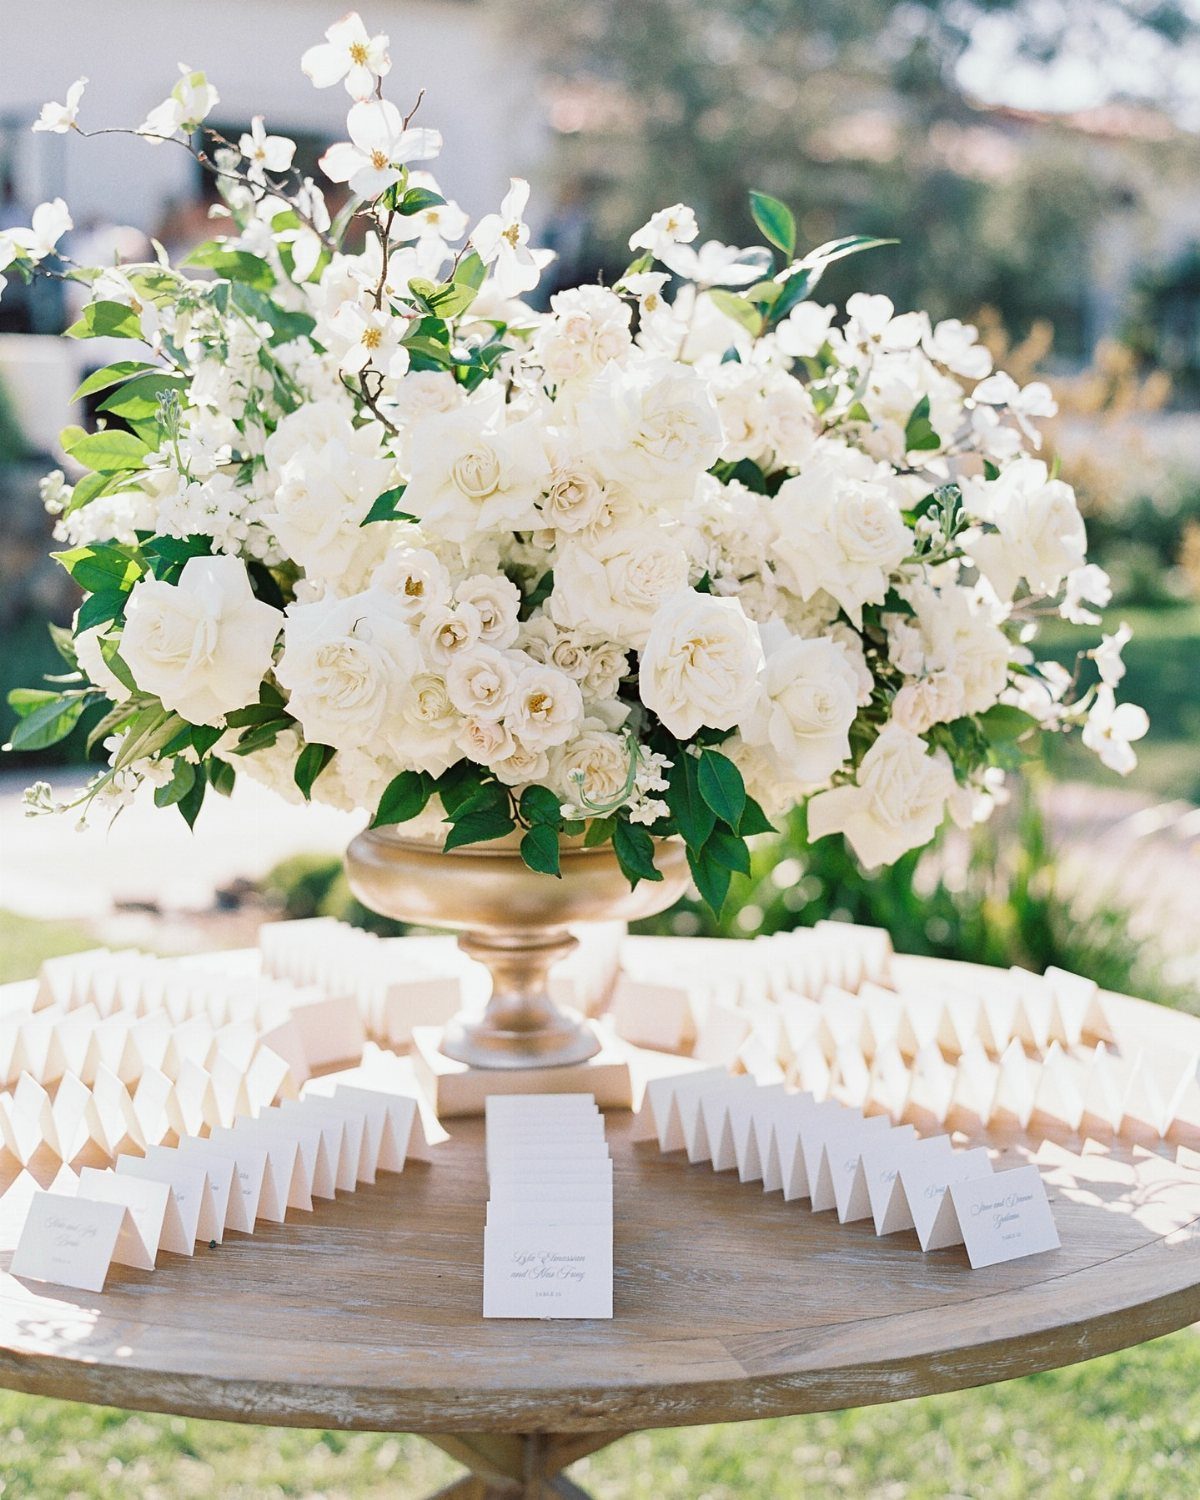
A folded card at each setting tells a guest exactly where to sit, and it works as a small piece of table styling too.
Plain white cards lean against a centerpiece without competing with it, which suits a table already carrying flowers.
Write names in a single consistent hand or print them in one font. Check spelling twice and add the table number if you are mixing cards with a chart.
Place cards cost more time than a chart alone, so I would use them where you want a specific seating order.
6. Round and Rectangular Tables
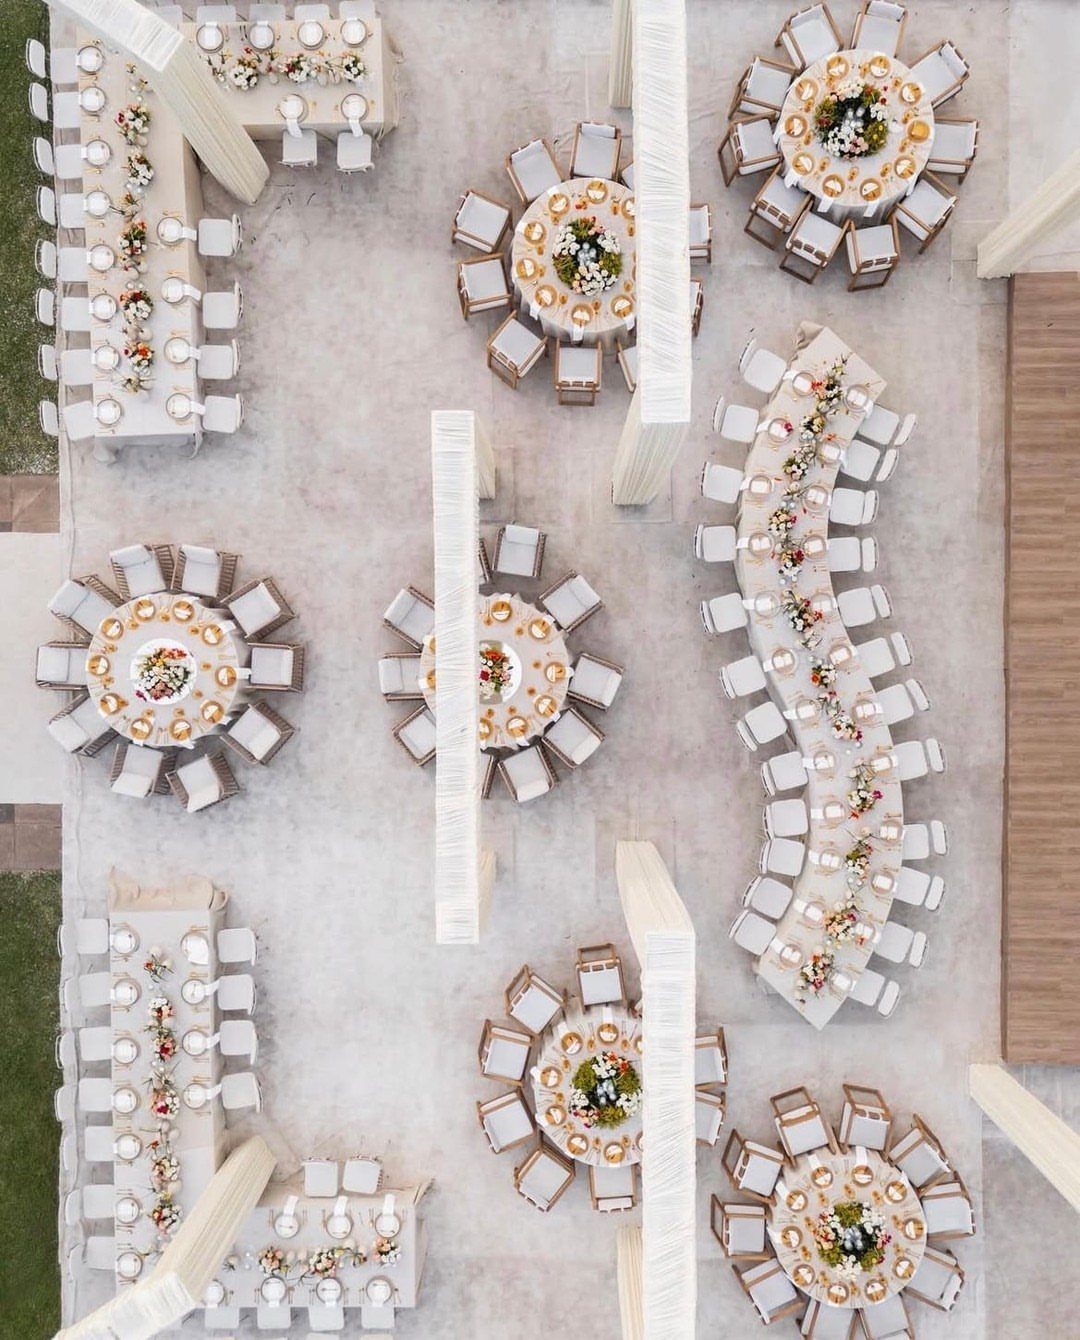
Mixing round tables with long, curved rectangles breaks up a room that would otherwise look like a grid.
The round tables give you easy conversation in groups of friends, while the long ones can hold a head table or a big family together.
Keep linens and centerpieces matching across both shapes so the variety reads as intentional. White cloths and similar florals do that job here.
On a patio, sketch the layout to scale first and confirm the curved tables leave room to walk around them.
7. Long Tables
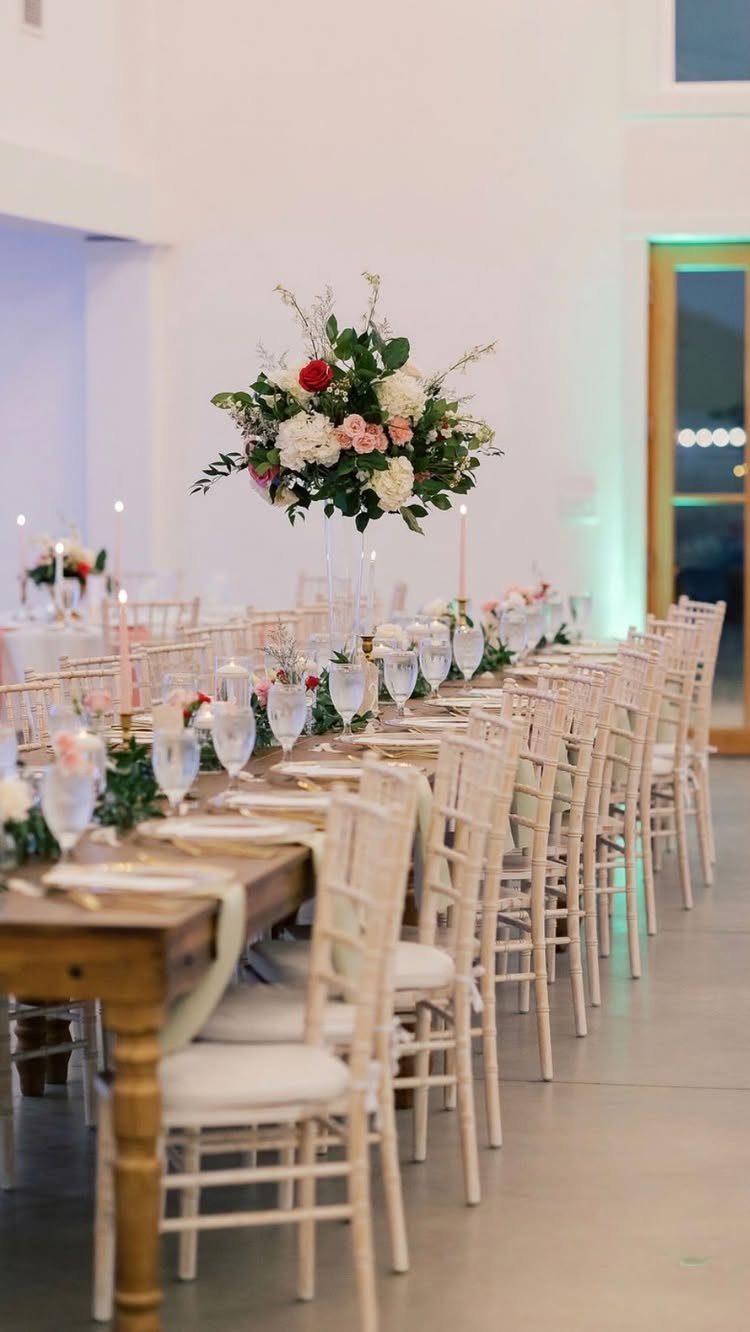
Long tables turn a room of separate groups into one shared meal.
Guests pass dishes, lean in and talk to people they did not come with, which is why I like them for couples who want mixed friends and family to actually meet.
Keep centerpieces low or spaced out, as in a row of small floral arrangements with candles between them, so nobody has to talk around a tall vase.
Seat the people most likely to mingle in the middle of each table.
8. Round Tables
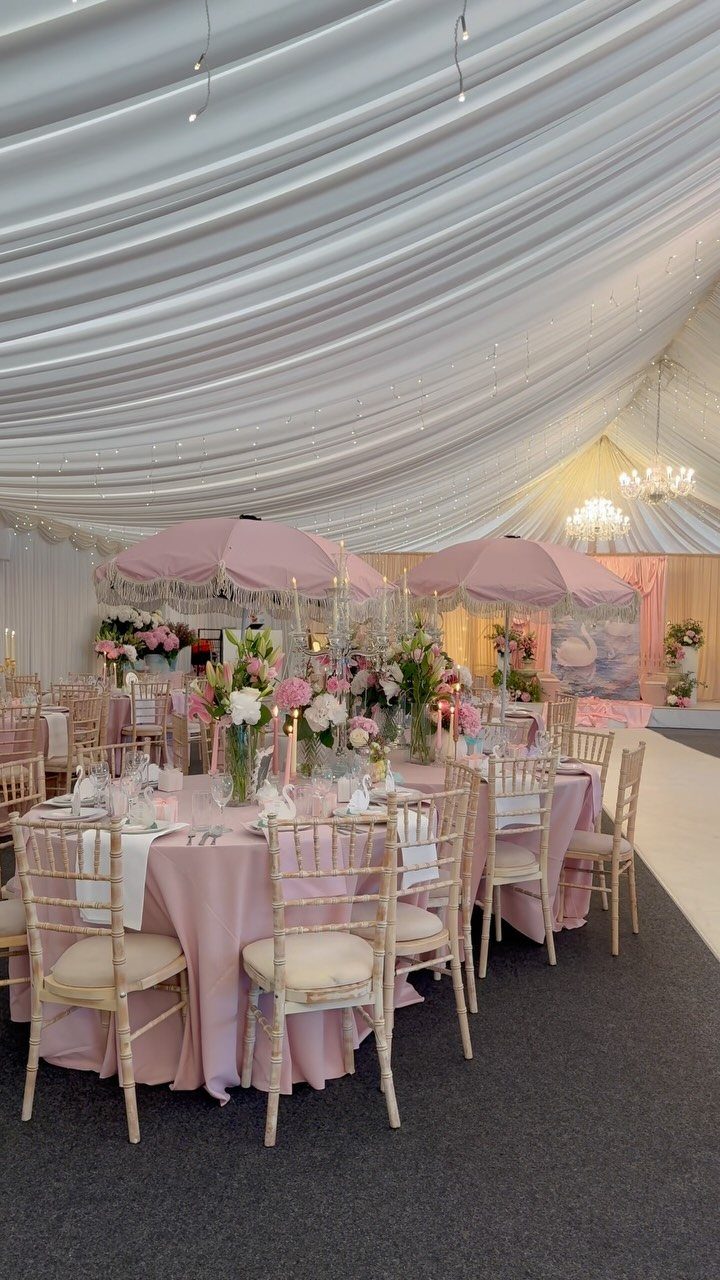
Round tables are the layout guests already know, and that familiarity is their strength: everyone sees everyone else at the table, and nobody sits at an awkward end.
Pick one centerpiece style and repeat it. Pink linens with matching florals tie the room together, and overhead details such as umbrellas fill the space above the tables without crowding the tabletop.
I would choose rounds when your guest list is a patchwork of groups, since each table can hold its own circle of friends or relatives.
9. Hand-drawn Seating Chart Sketch
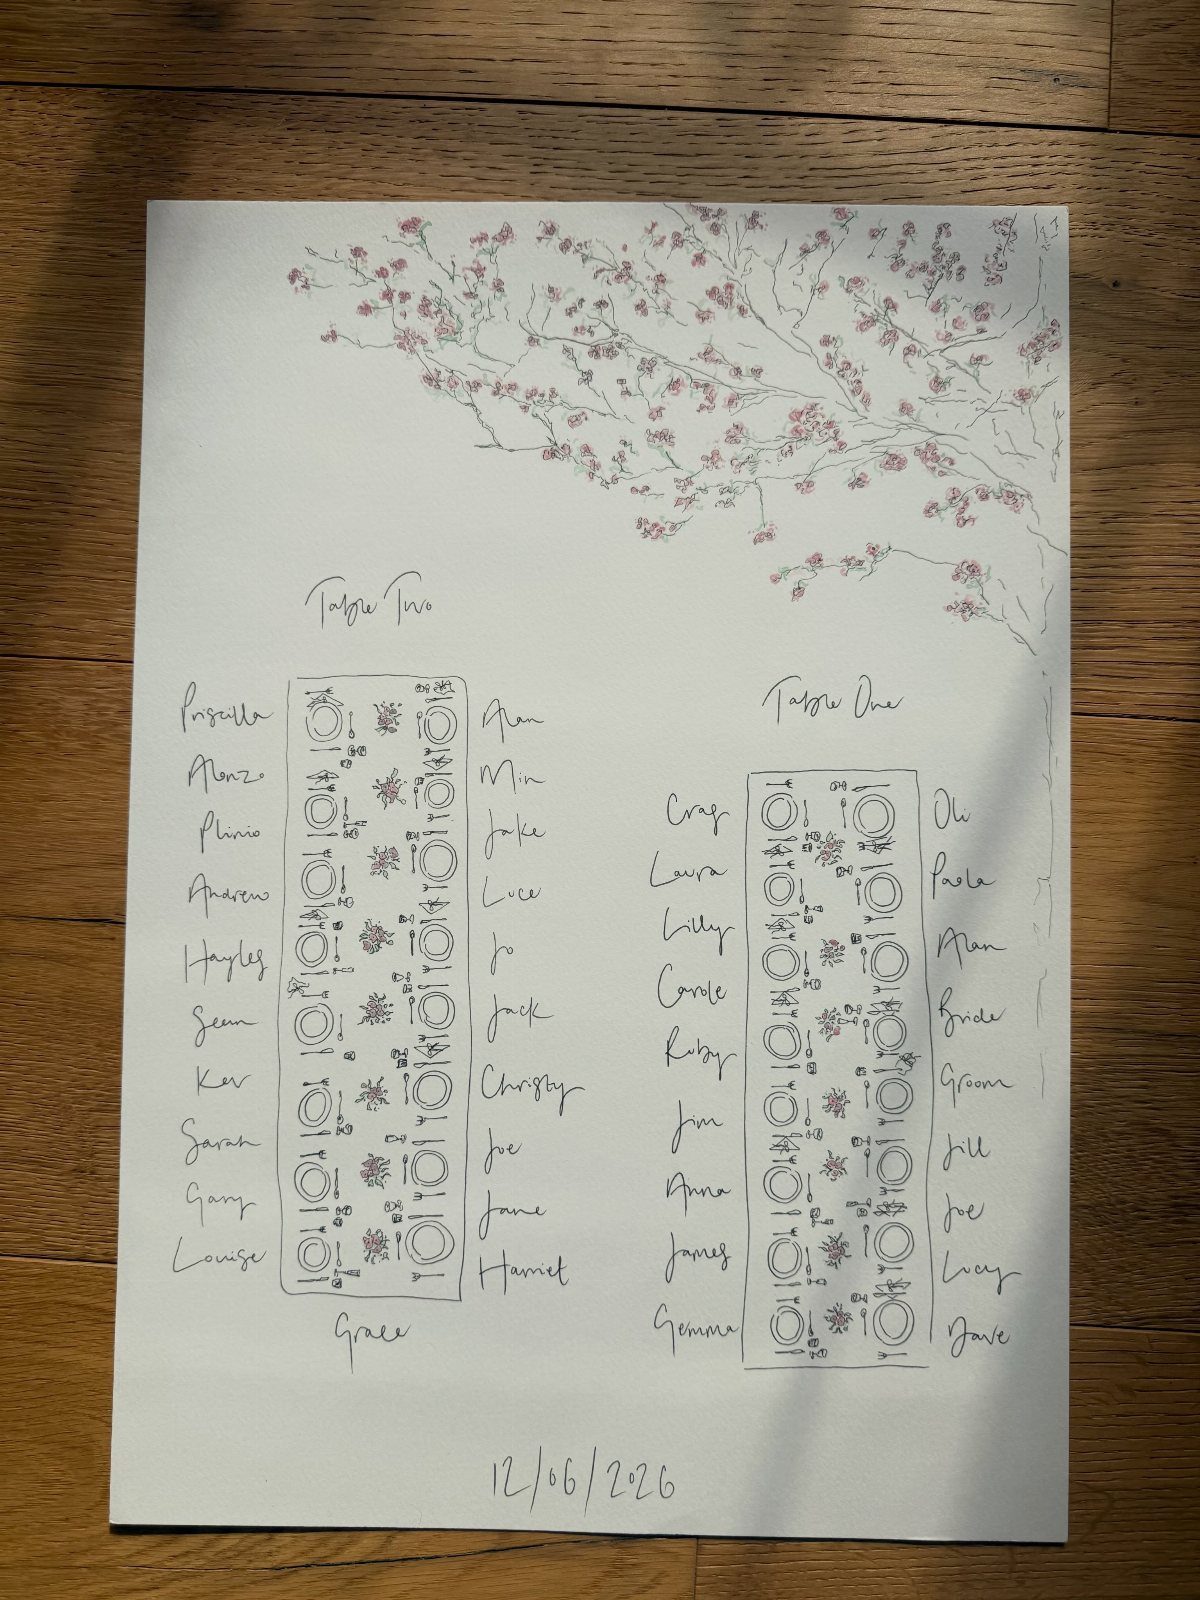
A sketch on paper costs a pen and an afternoon, and it can still look like a keepsake.
Draw each table as a simple rectangle, write the guest names around it, and add small flowers at the top and the date at the bottom.
Work in pencil first so you can shuffle names, then ink it once the RSVPs are final. Check every spelling before the pen touches the page, because there is no undoing ink.
This suits a small guest list best. A sketch with a few tables stays readable, and a large crowd would need a different format.
10. Envelope Pocket Wall Display
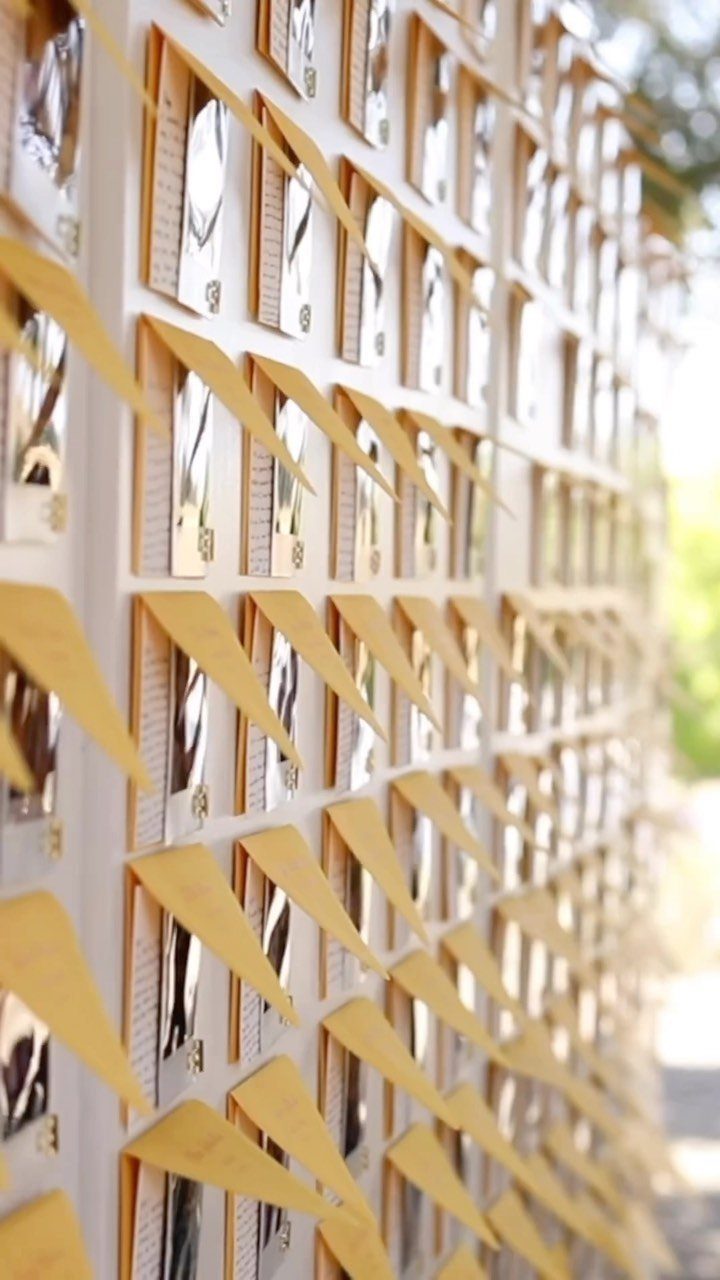
Rows of envelope pockets on a wall let guests pull their own card, which makes the seating plan something to touch instead of just read.
Each pocket holds a printed name card, and a small photo tucked beside it adds a personal touch.
Arrange the pockets in straight, evenly spaced rows against a plain wall so the color does the decorating. I would label rows by table so guests find their group fast.
Fill every pocket before guests arrive, and plan for a card to be taken from each one.
Timing for Seating Chart Creation
Start the chart about 3–4 weeks before the wedding. By then most RSVPs are in and your guest count has settled.
Start a draft as soon as you like, but expect RSVPs and plus-ones to shift late, and plan on reshuffling tables more than once. Keep an early version loose, and lock names to tables only once replies are final.
Working on paper, the job can eat days and a lot of scribbling. A digital tool or a spreadsheet makes the shuffling quicker, so one dropped guest doesn’t mean starting over.
Seating Chart Etiquette
Comfort comes before looks. Seat anyone who needs distance from each other first, whether that’s divorced parents, an ex or relatives who aren’t speaking, so the rest of the chart works around them.
Settling the must-seat-together and must-keep-apart guest lists before you draw up any tables saves you from untangling a finished seating chart.
Most couples put themselves and both sets of parents together at the head family table, though a sweetheart table for 2 is a fair alternative.
If your parents are divorced, I would set up a second family table so each parent has a comfortable place to sit.
Guest Experience Considerations
With seating in one long row, a guest ends up talking mostly to the 2 or 3 people next to them and the ones facing them, so I pair those neighbors with care.
Think about each person’s exact seat, not just their table.
Elderly guests and anyone using a mobility aid need wider paths and a seat near an aisle, so give them that spot, not a chair wedged against a wall.
List names alphabetically with a clear table number, so guests can find their seats easily as cocktail hour ends and dinner begins. Large, legible type matters more than fancy lettering.